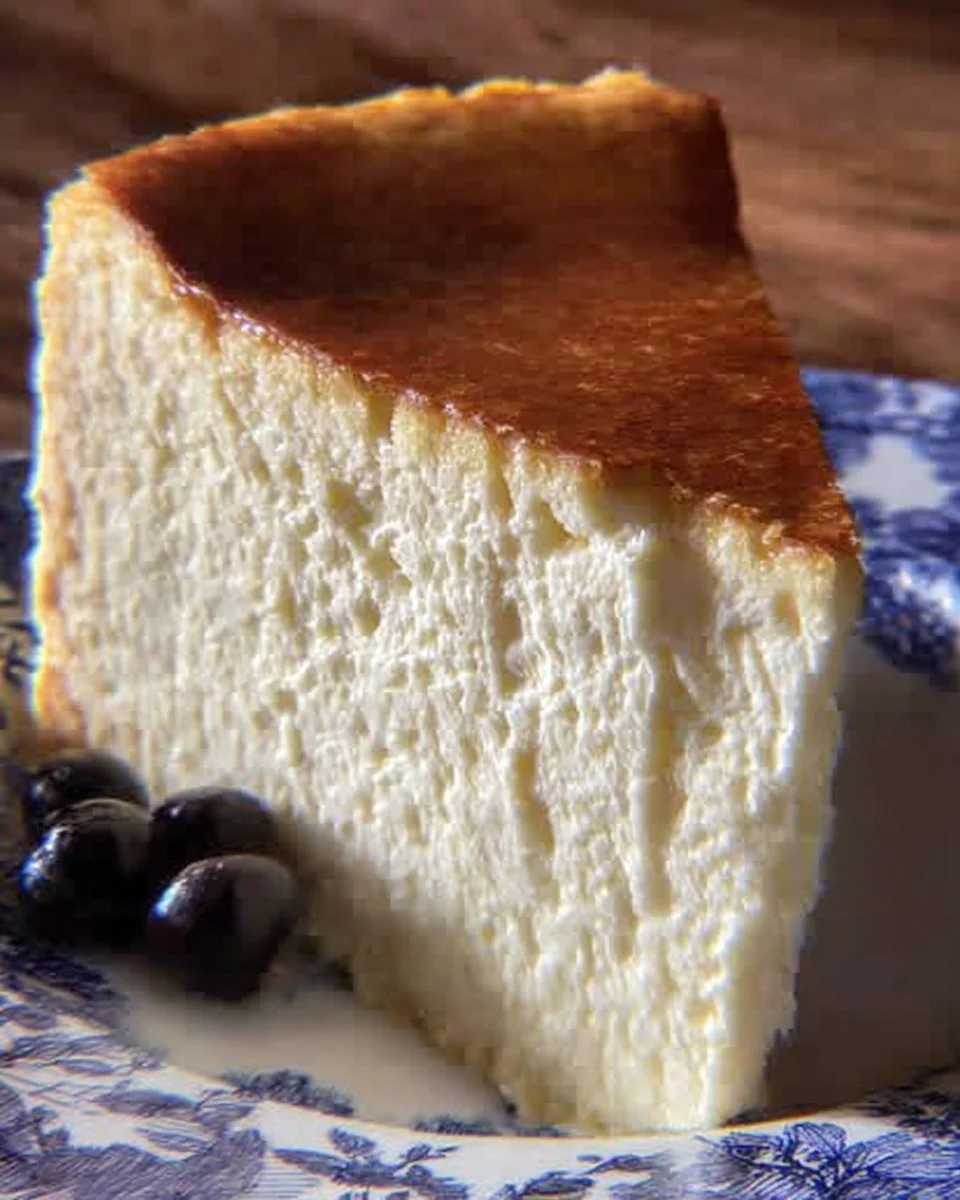
New York Cheesecake: A Slice of Sweet Nostalgia
When I think back to some of my happiest kitchen memories, New York cheesecake always takes center stage. Growing up, a classic cheesecake was the dessert for special occasions in our house—birthdays, holidays, or just a lazy Sunday craving something creamy and indulgent. The aroma of a freshly baked New York cheesecake wafting through the kitchen is pure nostalgia; it always sends me right back to those cozy evenings, licking the beaters and sneaking tastes of that smooth batter whenever my mom wasn’t looking.
There’s just something magical about the first silky bite—the tang of sour cream, the richness of cream cheese, and the buttery sweetness all dancing together. This classic New York cheesecake recipe is pure comfort and celebration all at once, and I can’t wait to share it with you!
Why You’ll Adore This New York Cheesecake
Here’s why this New York cheesecake will completely win your heart (and taste buds):
- Creamy Dreaminess: The combination of cream cheese, sour cream, and real butter makes every bite irresistibly smooth (it’s classic cheesecake decadence at its finest).
- Simple Ingredients, Big Flavor: With just a handful of everyday ingredients, you get that authentic New York flavor—no fancy techniques or equipment necessary.
- Foolproof for Home Bakers: This recipe is beginner-friendly and super forgiving (trust me—I’ve had my fair share of “oops” moments and it still comes out delicious).
- Perfect for Any Occasion: Whether you’re hosting a fancy dinner or craving a cozy night in, this cheesecake fits right in. It’s always a show-stopper!
Ingredients You’ll Need for New York Cheesecake
You won’t believe how simple this lineup is! Here’s what you’ll need (plus a few of my personal tips for getting the best results):
-
5 large eggs, room temperature
(Room-temperature eggs whip up smoother—just set them out while you prep!) -
2 cups (one pint) sour cream, room temperature
(Full-fat sour cream is my go-to; it gives your homemade cheesecake that signature tang!) -
4 8-ounce packages cream cheese, room temperature
(Trust me, don’t shortcut this—let it truly soften for the creamiest batter.) -
8 tablespoons (1 stick) unsalted butter, room temperature
(Unsalted keeps things mellow; if salted is all you have, just cut back a pinch elsewhere.) -
1½ cups granulated sugar
(I love classic white sugar for that gentle sweetness.)
It’s the simple things that make a classic New York cheesecake shine—just good-quality dairy and a bit of sugar magic.
Step-by-Step Guide: Making the Perfect New York Cheesecake
If you’re new to homemade cheesecake, don’t worry—I’ll walk you through it! Here’s how I make mine every time:
-
Preheat your oven to 350°F (175°C).
(I always double-check with an oven thermometer—consistent heat makes all the difference.) -
Beat the cream cheese and butter together in a large mixing bowl until smooth and creamy.
(A stand mixer is awesome, but elbow grease and a hand mixer work, too! Scrape down the sides often.) -
Gradually add the sugar while mixing, making sure everything blends evenly.
(I like to add it in thirds—it melts in easier and keeps the batter fluffy.) -
Add the eggs, one by one, mixing well after each.
(This keeps the batter light and avoids overbeating—I hum a little tune and let each egg fully tuck in.) -
Mix in the sour cream until the batter is completely smooth and glossy.
(Don’t rush this step! Lumps are the enemy of classic cheesecake texture.) -
Pour the batter into a greased 9-inch springform pan.
(A parchment-lined bottom makes removing each slice a breeze.) -
Bake for 50–60 minutes, until the center is set but still a bit jiggly when shaken.
(It should look just barely underdone—the magic happens as it cools.) -
Turn off the oven and cool the cheesecake inside with the door slightly open for 1 hour.
(This gradual cool-down helps prevent those dreaded cracks!) -
Refrigerate at least 4 hours—or overnight—before serving.
(I know, the waiting’s tough, but it’s worth every minute for that perfect slice!)
My Secret Tips and Tricks for New York Cheesecake Success
After years of baking cheesecakes (and a few less-than-perfect attempts), these are the little secrets I swear by:
-
Bring Everything to Room Temperature:
(Seriously! Cold dairy leads to lumpy batter. Let it all warm up on the counter.) -
Don’t Overmix:
(Mix just until things are combined—overmixing adds too much air and leads to cracks.) -
Go Slow on Cooling:
(The slow oven cool-down prevents splitting. If you do get a crack, just cover it with whipped cream or fresh berries. No one will mind!) -
Use a Good Springform Pan:
(It’s the best tool for classic cheesecake, allowing easy removal and a tidy presentation every time.) -
Water Bath Optional:
(Some swear by it, but this recipe is forgiving without one—just don’t overbake!)
Homemade cheesecake is all about a little patience and lots of love. You’ve got this!
Creative Variations and Ingredient Swaps
Love to experiment, or need to work around dietary needs? Try these fun twists on traditional New York cheesecake:
-
Lemon Zest:
(Stir in the zest of one lemon for a bright, citrusy kick.) -
Chocolate Swirls:
(Gently fold in melted dark chocolate for a marble effect—so decadent!) -
Gluten-Free:
(Skip the crust entirely—you’ll never miss it! Or use your favorite gluten-free cookie base.) -
Dairy-Free:
(Swap in your favorite vegan cream cheese and coconut yogurt for a plant-based cheesecake.) -
Fruit Toppings:
(Classic cheesecake with strawberry compote or blueberry sauce—hello, summer!)
These variations make your homemade cheesecake uniquely yours, and still deliver that classic creamy satisfaction.
How to Serve and Store Your New York Cheesecake
-
Serving:
(Let your cheesecake sit at room temperature for 15–20 minutes before slicing—it’ll be easier to cut and super creamy. I love topping mine with fresh berries, but a dusting of powdered sugar or a drizzle of caramel never hurts!) -
Storing:
(Wrap any leftovers tightly in plastic wrap or keep in an airtight container in the fridge for up to 5 days. For longer storage, freeze individual slices—just defrost overnight in the fridge before serving.)
This classic cheesecake actually improves with a day or two in the fridge—the flavors settle, the texture firms up, and it’s perfection with a hot cup of coffee.
FAQs: Your Top Questions About New York Cheesecake Answered
1. How do I prevent cracks in my cheesecake?
Letting your ingredients reach room temperature, avoiding overmixing, and cooling the cheesecake slowly in the oven all help prevent cracks (trust me, a few little cracks just add character).
2. Can I make New York cheesecake ahead of time?
Absolutely! In fact, it tastes even better after chilling overnight. It’s the ideal easy dessert for entertaining.
3. Do I need a water bath?
Not for this recipe—just follow the gentle cooling method. But if you’re a purist or want extra insurance, wrap your pan in foil and set it in a roasting pan with hot water.
4. What toppings go well with a classic New York cheesecake?
Try fresh berries, homemade fruit compote, chocolate ganache, or even a dollop of whipped cream. There’s no wrong answer!
5. Can I freeze cheesecake?
Yes! Wrap slices tightly in plastic and freeze for up to three months—your future self will thank you for stashing away a piece of this easy dessert.
Let me know if you give this classic New York cheesecake recipe a try! Whether you’re an old pro or baking homemade cheesecake for the very first time, I hope you’ll find as much joy (and deliciousness) in it as my family and I always have. Enjoy every creamy, decadent bite!