he phrase “it’s better with butter” to the test.
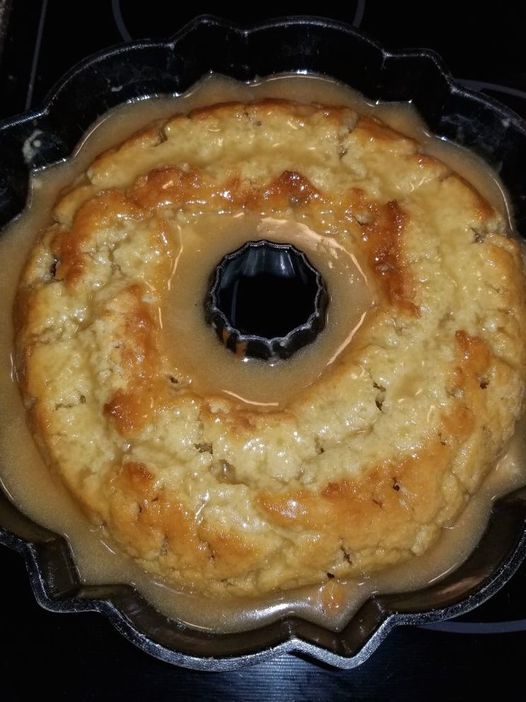
This cake here puts the phrase “it’s better with butter” to the test, and it does a darn fine job. If there’s any doubt in your mind that that old phrase is true, this cake will take care of it. It’s ever so moist, just sweet enough, and saturated in rich, buttery flavor.
It’s a cake that holds its own without frosting or filling and that largely has to do with the fact that while there’s butter baked into the cake, there’s also a sweet buttery sauce that’s poured over the whole thing and left to soak in while it cools. We’re not messing around. Butter is in the name of the cake, after all!
Serves 8-10
30 minutes active, 2 hours inactive
INGREDIENTS
For the cake:
- 3 cups all-purpose flour
- 1 cup butter, room temperature
- 1 cup buttermilk
- 1 cup granulated sugar
- 1 cup brown sugar
- 4 eggs
- 1 tablespoon vanilla extract
- 1 teaspoon salt
- 1 teaspoon baking powder
- 1/2 teaspoon baking soda
For the glaze:
- 3/4 cup granulated sugar
- 1/3 cup butter
- 2 tablespoons water
- 2 teaspoons vanilla extract
DIRECTIONS :
- Preheat oven to 350°F and liberally grease and flour a 10-inch bundt pan. Set aside.
- In a large mixing bowl, cream together the butter and sugars with an electric mixer until light and fluffy. Add the eggs, one at a time, mixing well after each addition. Add vanilla.
- In a separate bowl, whisk together the flour, baking soda, baking powder, and salt.
- Add flour mixture to the butter/sugar mixture in thirds, alternating with the buttermilk, starting and ending with the flour mixture. Mix well between each addition.
- Pour mixture into prepared bundt pan and bake until a toothpick inserted into the center comes out clean, about 60-65 minutes.
- Set the cake aside to cool and make the glaze. Combine sugar, butter, water, and vanilla in a small saucepan and place over medium-low heat. Stir continuously until butter melts and sugar has dissolved.
- Using a knife or wooden dowel, poke holes all over the top of the cake and pour the glaze evenly over the top.
- Allow cake to cool completely in the pan, and then invert onto your serving plate. Slice, serve, and enjoy!
Note: feel free to make this cake a day ahead. This gives the glaze time to really sink into the cake.

