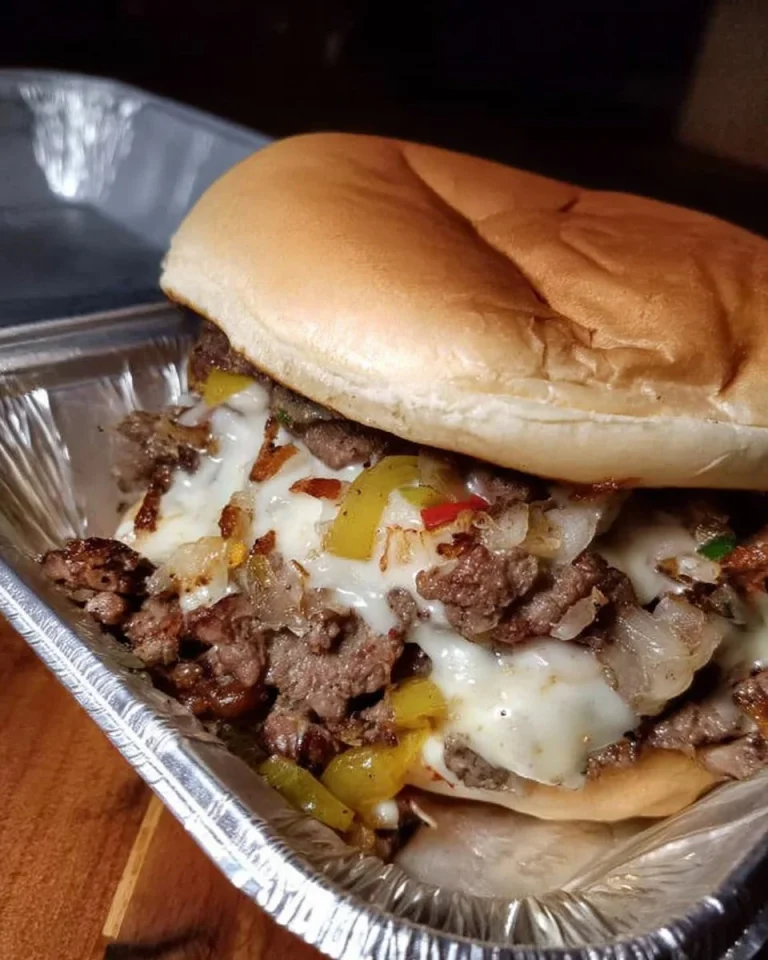
A Nostalgic Night In: The Heart and Soul of Homemade Cheese Steak
I’ll never forget the first time I tried to make a cheese steak at home. It was a chilly Friday night, and all I wanted was the comfort of warm, gooey cheese melting over savory steak, piled high on a crusty hoagie roll—the kind of simple, cozy meal you crave after a long week. As the onions and bell peppers sizzled in my little kitchen, their aroma took me straight back to carefree summer evenings on the boardwalk, where the only debate was, “Wiz or provolone?” (Pro tip: there’s no wrong answer). There’s something magical about building a classic steak and cheese sandwich from scratch. You don’t just end up with an easy, irresistible dinner—you create a memory. And that’s what I absolutely love about making the perfect homemade cheese steak.
Why You’ll Adore This Cheese Steak
If you’re on the fence about making your own cheese steak, let me convince you—this recipe is the real deal! Here’s why I bet you’ll find yourself making it on repeat:
- Unbeatable Flavor: Tender ribeye steak, buttery-sweet onions, and crisp bell peppers all mingle together under a blanket of melty provolone cheese (yes, it’s as glorious as it sounds).
- Ridiculously Quick: You can go from “I’m starving” to “Dinner’s ready!” in just about 30 minutes, making it a true weeknight savior (steak sandwich recipes don’t get easier).
- Cost-Effective Comfort: Homemade cheese steak means big takeout flavors for a fraction of the price, and you control exactly what goes in (hello, customizable sandwich!).
- It’s Just Plain Fun: There’s a certain joy in piling together all those layers yourself. It’s hands-on, a little messy, and a whole lot of delicious.
Ingredients You’ll Need for Cheese Steak
Let’s talk about what goes into the best cheese steak at home—plus a few little tips I’ve learned along the way:
- 2 hoagie rolls: Grab bakery-fresh rolls if you can (they make all the difference in a steak and cheese sandwich—soft inside, crispy out).
- 8 oz ribeye steak, thinly sliced: Ask your butcher to slice it super thin for you, or pop it in the freezer for 15 minutes to make slicing easier at home. Ribeye’s marbling guarantees juicy, flavorful beef.
- 1 cup bell peppers, sliced: I love using a mix of red and green for color and sweetness. Use what you have or what’s in season.
- 1 cup onions, sliced: Yellow or white onions both work. The longer you sauté, the sweeter and more caramelized they’ll become.
- 4 slices provolone cheese: Provolone melts beautifully, but feel free to mix in American if you like things extra gooey.
- 2 tbsp olive oil: For sautéing—keeps everything golden and luscious.
- Salt and pepper to taste: I like Maldon salt for a final sprinkle, but any sea salt is great.
Step-by-Step Guide: Making the Perfect Cheese Steak
Ready? Let’s make magic—and a killer steak sandwich—together.
- Prep your veggies and steak. Slice the onions, bell peppers, and ribeye as thinly as possible for even cooking. A little patience here pays off.
- Sauté the peppers and onions. In a large skillet over medium heat, warm the olive oil. Toss in the onions and bell peppers. Stir occasionally until they’re soft and just starting to brown (about 7 minutes). The smell is amazing—trust me!
- Push veggies aside, cook the steak. Slide the veggies to one side of the pan. Add your thinly sliced steak to the other half. Let it cook undisturbed so you get some nice browning (about 2-3 minutes), then flip and finish cooking.
- Combine and season. Mix everything together in the skillet, then season generously with salt and pepper. Taste and adjust if needed.
- Add the cheese. Lay provolone slices over the beef and veggies. Cover the skillet for a minute or so until the cheese gets perfectly melted and drapey (the hardest part of this steak sandwich is waiting!).
- Toast the rolls. Split your hoagies and toast them lightly—either in the oven or a hot skillet. This adds a nice crunch and keeps them from getting soggy.
- Assemble and serve. Pile the cheesy steak mixture into the warm rolls. Serve immediately, napkins at the ready.
My Secret Tips and Tricks for Cheese Steak Success
Having made (and devoured) my share of cheese steak sandwiches, here’s what I’ve discovered along the way:
- Cut the meat paper-thin: It’s the key to that authentic steak sandwich texture and quick sear. If you can’t get ribeye, sirloin or even skirt steak works, too! (Great for homemade Philly cheese steak or steak hoagie variations.)
- Don’t overstuff the roll: Trust me, it’s tempting, but leave room so you can actually pick it up without everything falling out.
- Let the cheese melt naturally: Cover the pan to get that ooey-gooey magic—don’t rush it!
- Toast the roll just before serving: It keeps the bread warm and the outside crisp, which makes a world of difference in your cheese steak sandwich experience.
Creative Variations and Ingredient Swaps
Want to make this steak and cheese recipe totally your own? Try one of these crowd-pleasing spins:
- Chicken Cheese Steak: Substitute thinly sliced chicken breast for the beef for a lighter twist.
- Go Spicy: Add some sliced pickled jalapeños or crushed red pepper for a spicy steak sandwich.
- Mushroom Magic: Toss in sautéed mushrooms (cremini or portabella are great) for earthy flavor—perfect for a vegetarian cheese steak option, too!
- Low-Carb Option: Skip the hoagie and load the steak and cheese mixture into a bell pepper “boat” or over a baked potato.
- Different Cheeses: Swap in American, mozzarella, or even cheddar for a totally different melt and flavor profile.
These ingredient swaps keep things fresh and let you cater to any steak sandwich craving or dietary need.
How to Serve and Store Your Cheese Steak
Cheese steak sandwiches are best enjoyed hot, straight from the skillet onto your toasted roll. Pair them with crispy fries, a bright green salad, or even just a cold, refreshing drink (think: classic soda or a root beer float).
If you have leftovers (lucky you!), store the steak, veggies, and cheese mixture separately from the rolls in airtight containers. Reheat in a skillet for best texture and assemble just before serving. I wouldn’t recommend freezing, but the filling will last 2-3 days chilled—perfect for impromptu steak sandwiches or topping baked potatoes!
FAQs: Your Top Questions About Cheese Steak Answered
Q: What kind of steak should I use for a cheese steak sandwich?
A: Ribeye is classic for homemade cheese steak thanks to its marbling and flavor. Sirloin or even flank steak are good alternatives if you slice them super thin.
Q: Can I make this steak sandwich recipe ahead of time?
A: You can prep the veggies and steak ahead, but for the best cheese steak experience, I recommend cooking and assembling just before serving so the cheese melts perfectly and the roll stays crisp.
Q: How do I get that really thin steak at home?
A: Freeze your steak for 15-20 minutes before slicing—this firms it up so you can slice it extra thin with a sharp knife. Or, ask your butcher to do it for you!
Q: What’s the best bread for a cheese steak?
A: Authentic hoagie rolls are my favorite for steak sandwiches—they’re sturdy on the outside and soft on the inside. If you can’t find them, try Italian rolls or even a split baguette.
Q: Can I add more vegetables?
A: Absolutely! Mushrooms, jalapeños, or even spinach take this cheese steak recipe up a notch. Embrace your creativity—it’s your kitchen after all.
I hope this guide inspires you to make your own homemade cheese steak sandwich soon. There’s real magic in recreating takeout favorites at home, and every bite is a little piece of comfort. If you give this recipe (or any steak hoagie spin of your own) a try, let me know in the comments—I’d truly love to hear how it turned out for you! Happy cooking!